Final Walkthrough Before Closing: Important things You Need to Look For
Buying a home can feel most intense in the final days, when closing documents, moving plans, lender requests, and last-minute details all compete for attention.
A final walkthrough before closing gives you a focused opportunity to return to the property and confirm that the home still matches the condition and property-related terms you agreed to.
The walkthrough is not a second home inspection and it is not an automatic chance to renegotiate the purchase.
Its job is narrower: verify agreed repairs, confirm included items are still present, look for significant new damage or changes, and make sure the property is ready for transfer under your agreement.
A useful way to approach the walkthrough is to compare what was agreed with what is actually there now.
That keeps the visit practical, reduces last-minute confusion, and helps you focus on issues that could matter before you sign closing documents.
What Is a Final Walkthrough Before Closing?
A final walkthrough is a buyer’s pre-closing visit to the property to verify its condition shortly before the transaction is completed.
Whether a walkthrough is contractually required, optional, or expressly provided for depends on your purchase agreement and the process that applies to your transaction.
When a walkthrough is available, using it gives you a final condition check before you sign.
The Consumer Financial Protection Bureau’s closing guidance advises buyers to walk through the home before signing closing papers, make sure agreed repairs were completed, and confirm that anything the seller agreed to leave is still in place.
The walkthrough is therefore a verification step. You are not trying to diagnose every system in the home from the beginning.
You are checking whether the property you are about to accept is materially consistent with your agreement and with what you reasonably expected after earlier inspections, negotiations, and visits.
Four questions can keep the walkthrough on track:
- Were the agreed repairs or corrections completed?
- Are the fixtures, appliances, and other included items still present?
- Has any significant new damage or unexpected change appeared?
- Is the property in the agreed condition for closing and possession?
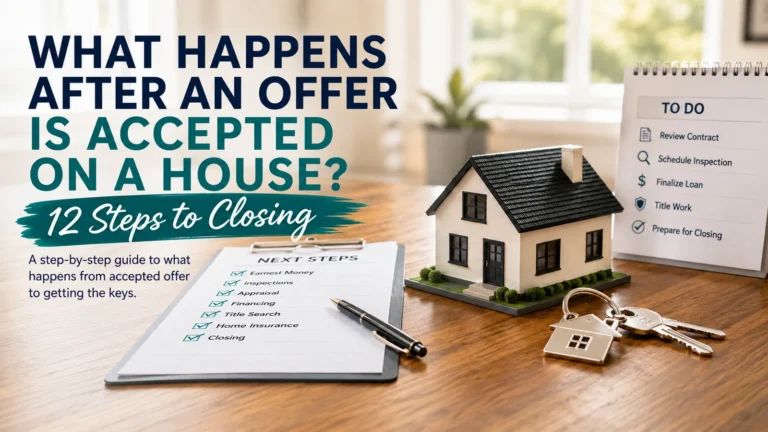
The final walkthrough fits near the end of the larger process described in what happens after an offer is accepted on a house.
By this stage, inspection, appraisal, financing, title work, and other closing preparations may already be well underway or complete.
When Should You Do the Final Walkthrough?
The final walkthrough usually happens close to closing, but there is no single nationwide timing rule for every purchase.
Freddie Mac’s closing guidance recommends requesting a formal walkthrough 24 hours before closing. Fannie Mae’s home-closing guidance similarly places the walkthrough on or soon before the closing date.
Those are useful planning benchmarks, not substitutes for your purchase agreement or local process. The exact timing can depend on the contract, the closing schedule, when the seller is moving out, when repairs are expected to be finished, and when the parties have access to the property.
Doing the walkthrough close to closing has a practical advantage: less time remains for the property’s condition to change before ownership transfers.
At the same time, allow enough time to inspect the property methodically and raise a material concern before you are sitting at the closing table.
Should the seller be moved out first?
If the agreement calls for the seller to vacate before closing, an empty or nearly empty home can make the walkthrough more useful. Furniture, rugs, boxes, and wall hangings can conceal flooring, walls, closets, and other areas that become visible only after move-out.
Freddie Mac recommends checking that the seller has vacated as expected. However, possession arrangements vary.
Some transactions provide for possession at a different time, including situations in which the seller remains temporarily after closing under a written agreement.
Use the actual contract and possession terms rather than assuming that every seller must be completely moved out at the same moment.
Final Walkthrough vs. Home Inspection
A final walkthrough and a professional home inspection answer different questions.
The CFPB’s home-inspection guidance describes the inspection as a buyer-protection step that can help identify serious property problems early enough to investigate them and consider contractual options.
The walkthrough occurs much later and focuses on whether the property remains in the expected or agreed condition.
| Home inspection | Final walkthrough |
|---|---|
| Usually occurs earlier in the transaction | Usually occurs shortly before closing |
| Examines accessible property systems and components in greater detail | Verifies current condition and agreed property-related terms |
| Usually performed by a professional home inspector | Buyer verifies the property condition shortly before closing |
| Helps identify defects, maintenance issues, and areas needing further evaluation | Helps identify unfinished repairs, missing included items, new damage, or other unexpected changes |
| Can inform inspection-related decisions under the contract | Confirms whether the property appears ready for closing under the agreement |
If you need a detailed inspection-day and report-review process, use the separate home inspection checklist for buyers.
The final walkthrough should not be used to recreate the inspection from scratch or to assume that every previously known defect can be renegotiated.
Focus on the written agreement, agreed repairs, included items, and meaningful changes since you last saw the property.
What to Bring to the Final Walkthrough
You do not need to carry the entire transaction file through the house. Bring the documents and tools that help you compare the property with the agreement.
Useful items can include:
- the purchase agreement or relevant property-condition provisions;
- repair amendments, addenda, or written repair agreements;
- a list of repairs the seller agreed to complete;
- the earlier inspection report when you need to reference a specific agreed repair or condition;
- a written list of fixtures, appliances, or personal property included in the sale;
- your phone for notes and photographs where appropriate;
- a simple checklist or notepad;
- contact information for your real estate professional, settlement professional, or attorney if one is involved in your transaction.
Closing week can be busy, so make the walkthrough deliberately simple. Start at one point in the property, move through it in a consistent order, and record concerns as you find them. This is more reliable than jumping from room to room from memory.
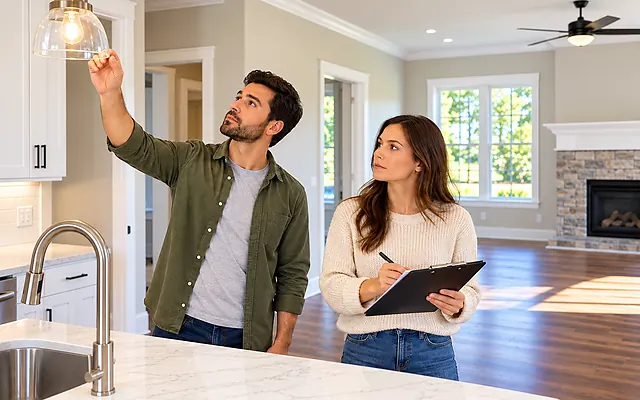
If two people are attending, one can focus on the physical checks while the other keeps notes and compares items with the written agreement.
Final Walkthrough Before Closing Checklist
The National Association of REALTORS final walk-through checklist highlights repairs, included items, appliances, systems, rooms, seller belongings, remotes, warranties, and unexpected changes. The checklist below organizes those concerns around the buyer’s main task: verifying the property’s agreed condition.
| Check | What you are verifying |
|---|---|
| Written agreement | The property matches the terms that apply at closing |
| Agreed repairs | Required work appears completed and documented where applicable |
| New damage | No significant new problem has appeared since earlier visits |
| Included items | Agreed fixtures, appliances, and other items remain at the property |
| Appliances and systems | Readily testable included items appear to operate as expected |
| Rooms and storage areas | Accessible spaces are in the expected condition |
| Exterior areas | No obvious material change or move-out damage is apparent |
| Seller move-out | Belongings and debris are removed as required by the agreement |
| Transfer items | Agreed remotes, manuals, warranties, or similar items are accounted for |
1. Start with the purchase agreement
Before checking faucets or appliances, confirm what the seller was actually obligated to do.
Review the portions of the agreement that address property condition, repairs, fixtures, personal property, possession, and any later amendments. This matters because a final walkthrough is not based only on what either party remembers discussing.
The American Bar Association’s home purchase-contract guidance notes that purchase contracts can address items included or excluded from the sale, possession, and escrow terms. It also identifies a walkthrough provision within a specified period before closing so the buyer can verify that conditions conform to the contract.
Use those written terms as your reference point.
2. Verify agreed repairs
Check each repair or correction the seller agreed in writing to complete.
Depending on the agreement and the work involved, verification may include:
- visually confirming that the repair was completed;
- comparing the result with the written repair agreement;
- reviewing invoices, receipts, permits, warranties, or contractor documentation where those were required or provided;
- confirming that a specific item identified for repair is still present and appears addressed.
Do not assume that a repair is proven complete simply because an area looks different. Some work cannot be meaningfully evaluated without documentation or qualified expertise.
If the agreement required professional work, a permit, an invoice, or another form of evidence, check for that evidence rather than substituting a quick visual impression.
3. Look for significant new damage or changes
A home can change between inspection and closing. Furniture may be moved, wall-mounted items removed, appliances disconnected, or flooring exposed for the first time.
Look for meaningful changes such as:
- new wall, floor, or door damage from move-out;
- broken windows or damaged screens;
- new water staining or an active leak;
- missing fixtures or other included items;
- newly damaged cabinetry, counters, or built-ins;
- damage to garage doors or other exterior features;
- a major change in landscaping or exterior condition where relevant to the agreement.
Fannie Mae specifically recommends using the final walkthrough to confirm that the home has not taken on additional damage since the earlier inspection.
Keep the comparison realistic. A walkthrough is not an opportunity to treat every previously visible cosmetic imperfection as a new defect.
Focus on material changes, contractual commitments, and conditions that differ from what you reasonably expected at closing.
4. Confirm fixtures and included items are still present
One of the most important walkthrough tasks is checking that agreed items remain with the property.
Depending on your contract, that could include:
- lighting fixtures;
- ceiling fans;
- window treatments;
- built-in shelving;
- mirrors;
- garage door equipment;
- specified appliances;
- outdoor fixtures;
- other personal property expressly included in the sale.
Do not rely on assumptions about what “normally” stays with a house. Contracts can identify both inclusions and exclusions.
If an item that should remain is missing, photograph the relevant area if useful, note the item, and raise the issue promptly.
5. Check included appliances
If appliances are included in the sale, confirm that the agreed appliances are present and appear to operate.
Depending on the property and your agreement, these might include a refrigerator, range, oven, dishwasher, built-in microwave, washer, dryer, or other installed equipment.
Use ordinary controls only. The walkthrough is not the time to dismantle equipment, perform technical diagnostics, or attempt tests that could damage an appliance.
Your goal is to identify an obvious difference between what was agreed or previously observed and what is present immediately before closing.
6. Check plumbing for obvious problems
Walk through kitchens, bathrooms, laundry areas, and other accessible locations with plumbing.
Where appropriate, you can:
- run faucets;
- check hot and cold water at accessible fixtures;
- flush toilets;
- look under accessible sinks for active leaks;
- observe whether sinks, tubs, or showers drain normally;
- check around visible plumbing for new moisture.
A walkthrough cannot establish the condition of concealed pipes or diagnose a complex plumbing problem.
If you observe something significant, document it and obtain appropriate help rather than guessing at the cause.
7. Check readily accessible electrical fixtures
Test normal, readily accessible items such as:
- installed lights;
- ordinary wall switches;
- ceiling fans;
- doorbells;
- garage door controls where appropriate;
- other fixtures included in the sale.
Do not open electrical panels, remove covers, dismantle devices, or perform technical testing beyond what is safe and appropriate for a buyer walkthrough.
The earlier professional inspection remains the better source for detailed electrical-condition evaluation.
8. Confirm heating and cooling operation where appropriate
You may be able to confirm that the heating or cooling system responds to normal controls, depending on the weather, system design, and circumstances.
Use only normal controls, and avoid any test that would be unsafe or inconsistent with ordinary operation.
If the system behaves unexpectedly, document the observation and seek appropriate evaluation rather than trying to diagnose it yourself.
The purpose is not to diagnose the HVAC system. It is to notice whether an included system that should be available at closing appears materially different from what you expected.
9. Review doors, windows, and locks
Open and close readily accessible interior and exterior doors and windows where practical.
Look for:
- broken glass;
- damaged doors;
- missing or damaged hardware;
- new move-out damage;
- windows or doors that are obviously different from what you previously observed.
Confirming access devices and keys may occur at closing rather than during the physical walkthrough, so distinguish between what should already be at the property and what the parties have agreed will be transferred later.
10. Walk every accessible room and storage area
Do not stop after the kitchen and main living spaces.
Check bedrooms, bathrooms, closets, hallways, the basement, garage, storage rooms, and other safely accessible spaces.
Empty closets and garages are especially easy to overlook, even though move-out can reveal damage or debris that was hidden earlier.
If an attic, crawl space, roof area, or other location cannot be accessed safely, do not create a hazard by trying to inspect it yourself.
11. Review exterior areas included in the property
Walk the accessible exterior where practical.
Look for obvious new conditions involving:
- exterior doors;
- siding or trim;
- fences and gates;
- patios or decks;
- garage areas;
- landscaping or plantings where their removal would matter under the agreement;
- visible storm or move-out damage.
The goal is still comparison, not a new technical inspection.
12. Check for seller belongings and debris
Confirm that furniture, trash, construction debris, paint cans, stored items, and other belongings have been removed to the extent required by the purchase and possession agreement.
Do not assume every home must be delivered to an identical cleanliness standard. The relevant question is whether the condition matches the parties’ agreement and the closing or possession requirements that apply to the transaction.
If substantial debris remains, document the extent of it rather than relying on a vague description.
13. Account for remotes, manuals, warranties, and similar transfer items
NAR also recommends checking for garage remotes, instruction manuals, warranties, and similar property-related items.
Some of these may be handed over at closing instead of being left in the home. Make a note of anything expected under the agreement and confirm how and when it will be transferred.
This can include:
- garage door remotes;
- gate remotes;
- manuals for included appliances;
- transferable warranties;
- security or smart-home information where applicable;
- other agreed property-related materials.
What Should You Do If You Find a Problem During the Final Walkthrough?
A problem discovered at the walkthrough deserves attention, but the right response depends on what the problem is and what your contract provides.
Use a disciplined sequence.
- Document the condition. Take clear notes and photographs where useful.
- Identify the agreement involved. Determine whether the concern relates to an agreed repair, included item, possession term, or another written obligation.
- Notify the appropriate transaction professional promptly. This may be your real estate professional, settlement agent, escrow officer, or attorney, depending on your transaction and location.
- Determine the available options under the contract. Do not assume that one solution is automatically available.
- Put any resolution in writing through the proper transaction process. Avoid relying on a casual verbal promise when closing is imminent.
Possible responses depend on the contract and circumstances. They can include completing the work before closing, using a properly documented seller credit when permitted, changing the closing schedule by agreement, or another written solution handled through the transaction process.
The CFPB notes that when a seller has not completed an agreed repair, the seller might provide a credit toward closing costs instead of completing the repair before closing.
That does not mean every repair can be converted into a credit. Financing rules, settlement requirements, the purchase agreement, and the nature of the issue can affect what is permitted.
Do not assume you can unilaterally deduct money, hold back funds, order work on the seller’s behalf, or change the closing date.
If the problem could affect financing, insurance, settlement, or legal rights, involve the appropriate professional before you proceed.
Can a Buyer Back Out After the Final Walkthrough?
A final walkthrough problem does not automatically create a new right to cancel the purchase.
Whether a buyer can terminate can depend on the purchase agreement, any remaining contingencies, whether a party failed to perform a contractual obligation, the seriousness of the issue, required notice procedures, and applicable state law.
The CFPB explains that a buyer can choose not to sign closing documents, but walking away can have consequences under the purchase contract, including possible loss of a deposit or other costs.
The ABA likewise emphasizes that the purchase contract governs important rights and obligations surrounding the transaction.
If a significant walkthrough problem makes you question whether to close, do not make the decision based on a general internet rule. Review the signed agreement and obtain transaction-specific guidance from the appropriate real estate professional or attorney.
This guide provides general U.S. information, not transaction-specific legal advice. Contract rights, remedies, possession rules, and closing procedures can vary by agreement, state, and local practice.
What Happens After a Successful Final Walkthrough?
If the property is in the expected condition and there are no unresolved issues, the transaction can continue toward closing.
The walkthrough itself does not replace the remaining closing work. You may still need to review documents, follow lender or settlement instructions, arrange the required closing funds, sign documents, and complete other transaction-specific requirements.
For the larger closing-stage framework, see the Inspection, Appraisal & Closing guide.
If you are purchasing a newly built home, builder correction lists, construction-completion issues, warranty procedures, and new-construction walkthrough practices can involve a different process.
Use the separate guide to buying a new construction home rather than assuming every resale walkthrough rule applies in the same way.
Use the Final Walkthrough to Verify, Not Reinspect
The final walkthrough before closing is typically one of your last practical opportunities to compare the home you are about to accept with the property-related terms you agreed to.
Start with the contract. Verify agreed repairs. Confirm included items. Look for significant new damage or changes. Work through the home systematically, document meaningful discrepancies, and raise unresolved issues before signing rather than assuming they will be easier to fix afterward.
A calm, structured walkthrough cannot eliminate every uncertainty that comes with buying a home, but it can reduce avoidable surprises. The goal is not to prove that the property is perfect.
It is to make sure you understand what is being transferred to you and whether the home’s condition is consistent with the agreement before you complete the purchase.